
 |
| 3D Framed Flag |
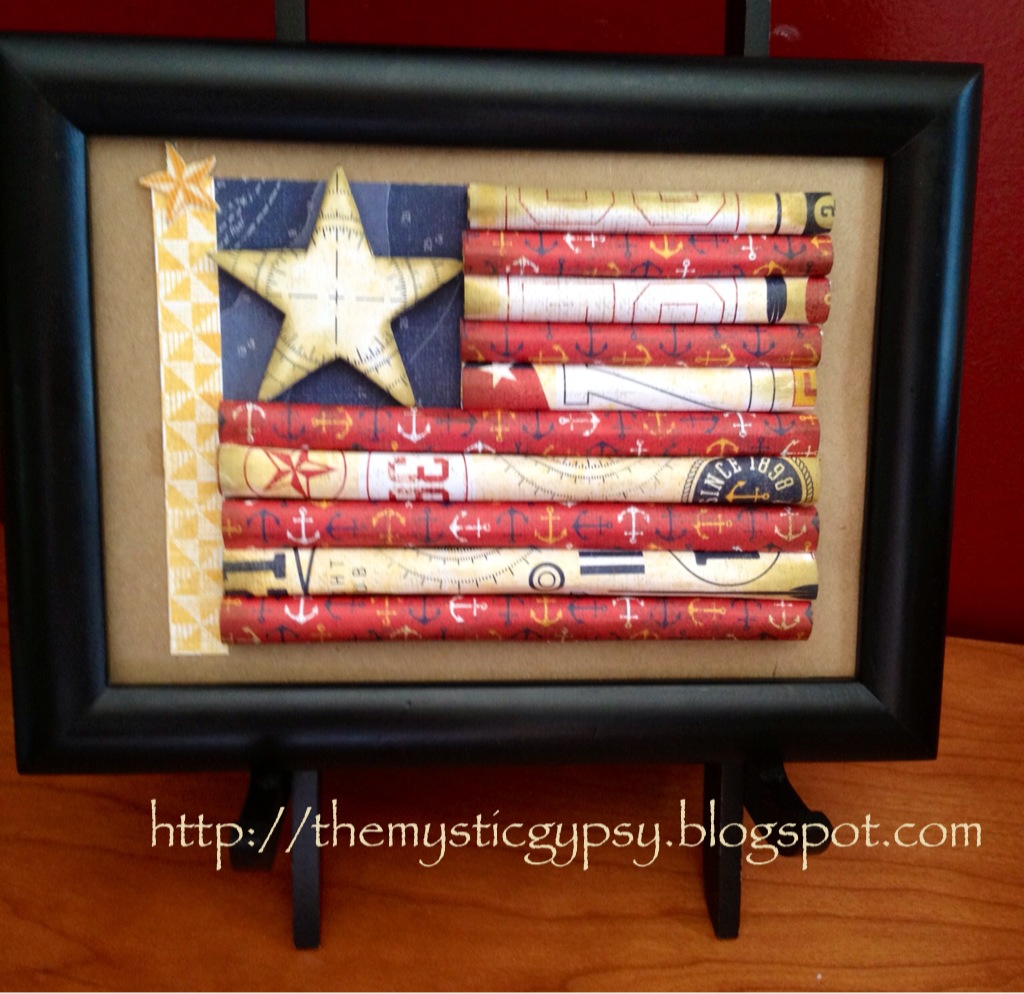
3D Framed Flag Project
One black 5x7" frame (with glass removed)
Bonding memories adhesive or liquid glass.
3D foam tape
Desert Sand Stamp Pad
Dimensional Element Star or smaller stars
Kraft Cardstock: 1 sheet
Tommy paper kit: I sheet red b/t with Anchors (about I sheet), 1 sheet of diagonal stripe b/t (I used the opposite site), 1 small piece of the honey small pennant b and t paper.
Instructions:
Kraft cs: 5x7
· Adhere to inside of your frame. Either on top of glass or remove glass entirely and adhere to the solid frame back to prevent bubbling or puckering.
Tommy bulk b/t (reverse side of the diagonal stripe) for the white stripes and to cover star with: 1.5"x 5" (3), 1.5"x 3" (3), 3x3 (1)
· Roll into cylinders and set aside. Use a pencil or pen to roll the pieces uniformly and slide off once edges are adhered.
Tommy Red Anchor b/t or same color red cs: 1.5"x 5" (3), 1.5"x 3" (3)
· Roll into cylinders and set aside. Use a pencil or pen if necessary.
2x2 dimensional elements star
· Using a piece of the lighter colored bulk b/t, trace star, cut out and adhere b/t to star, distress edges w desert sand.
Tommy b/t small honey pennants (reverse side of anchor b/t): 1/2"x 5"
· Distress w desert sand if desired
Tommy outdoor denim map b/t: 2.5 x 2.5 (1)
· This piece will be your navy background for the Star.
Once all items are prepared, assemble and adhere onto Kraft cs within the frame using the bonding memories. Distress with desert sand as desired. Pop up star with 3D foam tape. I put mine completed frame on an easel but you could use the navy and white twill to hang it on a door or the wall.
Did you see how I finished mine up? This was such a great project. Thanks so much for teaching it.
ReplyDeleteI did yours Jan and it came out ADORABLE! Its so much fun to see how each person personalizes it. Now I have at least ONE decoration up for the fourth!
ReplyDelete